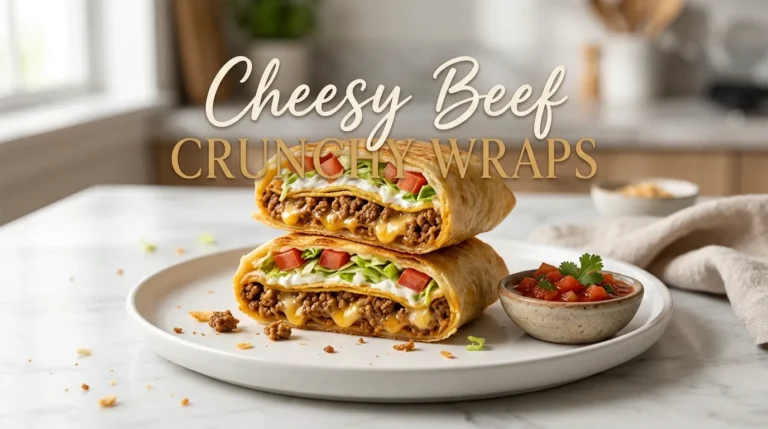
Imagine biting into a golden, crispy tortilla filled with juicy seasoned beef, melted cheese, crunchy lettuce, fresh tomatoes, and a creamy burger sauce. Every bite delivers the familiar flavor of a classic cheeseburger with an extra-crispy outside that makes this homemade wrap especially satisfying.
This Juicy Cheeseburger Crunch Wrap combines everything loved about a cheeseburger in one convenient, toasted tortilla. Instead of using a traditional burger bun, the filling is folded inside a large flour tortilla and cooked in a skillet until the outside becomes beautifully golden and crisp.
The best part is how simple this recipe is to prepare. Ground beef cooks quickly, the sauce comes together in minutes, and the wrap requires only a few everyday ingredients. There is no need for a grill or special cooking equipment.
This homemade cheeseburger wrap is perfect for busy weeknight dinners, weekend lunches, casual family meals, or whenever a fast-food-inspired meal sounds appealing. It can also be customized with favorite burger toppings, extra cheese, or a little spice.
With juicy beef, creamy sauce, crisp vegetables, and a crunchy tortilla shell, this Juicy Cheeseburger Crunch Wrap brings plenty of flavor and texture to the table without making dinner complicated.
Ingredients
This recipe makes 4 generous cheeseburger crunch wraps.
Ingredients for the Beef Filling
- 1 pound (450 g) ground beef: Choose ground beef with approximately 80–85% lean meat for a juicy filling.
- 1 teaspoon olive oil: Use if needed to prevent the beef from sticking to the pan.
- 1 teaspoon garlic powder: Adds a savory flavor to the beef.
- 1 teaspoon onion powder: Gives the meat a classic burger-style taste.
- ½ teaspoon smoked paprika: Adds gentle smokiness and warmth.
- ½ teaspoon salt: Seasons the beef.
- ¼ teaspoon ground black pepper: Adds a mild peppery finish.
- 1 tablespoon Worcestershire-style seasoning, optional: Use only a halal-friendly, alcohol-free product, or replace it with 1 teaspoon soy sauce.
Ingredients for the Crunch Wraps
- 4 large flour tortillas, approximately 10–12 inches each: These form the outer wrap.
- 4 small flour tortillas, approximately 6 inches each: These cover the filling in the center and help seal the wraps.
- 4 tostada shells: Add the signature crunchy middle layer. Plain, halal-friendly tortilla chips can be used as an alternative.
- 8 slices cheddar or burger cheese: Provides a creamy, melted cheese layer.
- 1 cup shredded iceberg lettuce: Adds freshness and crunch.
- 1 medium tomato, diced: Provides juicy, fresh flavor.
- ½ small red onion, finely diced: Adds a little sharpness and crunch.
- 2 tablespoons butter or olive oil: For toasting the wraps until golden.
Ingredients for the Creamy Burger Sauce
- ½ cup mayonnaise: Creates a rich, creamy base.
- 2 tablespoons ketchup: Adds sweetness and tomato flavor.
- 1 tablespoon yellow mustard: Provides a tangy burger-style taste.
- 1 tablespoon finely chopped dill pickles: Adds a pleasant, tangy crunch.
- ½ teaspoon garlic powder: Gives the sauce extra savory flavor.
- ¼ teaspoon smoked paprika: Adds gentle warmth.
Check the labels of the mayonnaise, cheese, sauces, and seasonings to ensure the ingredients meet halal requirements. Avoid Worcestershire-style products containing alcohol or unsuitable animal-derived ingredients.
Tools and Equipment
- A large skillet or frying pan
- A small saucepan or nonstick frying pan for the beef
- A mixing bowl
- A spatula or wooden spoon
- A sharp knife
- A cutting board
- Measuring cups and spoons
- A spoon for spreading the sauce
- A clean plate for assembling the wraps
Step-by-Step Instructions
Step 1: Prepare the Creamy Burger Sauce
Add the mayonnaise, ketchup, yellow mustard, chopped dill pickles, garlic powder, and smoked paprika to a small bowl.
Stir until the ingredients are evenly combined and the sauce looks smooth and creamy. Taste and adjust the seasoning if needed.
Cover the bowl and refrigerate the sauce while preparing the remaining ingredients. Chilling briefly allows the flavors to blend.
Step 2: Season the Ground Beef
Place a large skillet over medium-high heat. Add the olive oil if the pan needs it.
Add the ground beef and break it into small pieces using a spatula. Sprinkle over the garlic powder, onion powder, smoked paprika, salt, and black pepper.
If using halal-friendly Worcestershire-style seasoning, add it while the beef cooks.
Step 3: Cook the Beef Until Juicy
Cook the beef for approximately 7–10 minutes, stirring occasionally, until it is thoroughly browned and no pink remains.
Break up any large pieces so the filling spreads evenly inside the tortillas. If excess fat collects in the pan, carefully drain the extra while leaving enough moisture to keep the meat flavorful.
Ground beef should reach an internal temperature of 160°F (71°C) for safe consumption.
Remove the skillet from the heat and set the cooked beef aside.
Step 4: Prepare the Vegetables
Wash and dry the iceberg lettuce and tomato. Shred the lettuce into thin strips and dice the tomato into small pieces.
Finely chop the red onion and set all the vegetables aside in separate bowls.
If the diced tomato is especially watery, remove some of the seeds and excess juice. This helps prevent the finished crunch wraps from becoming soggy.

Step 5: Warm the Tortillas
Warm the large and small tortillas briefly in a dry skillet or microwave.
Heat them just until they become soft and flexible. This makes folding easier and reduces the chance of the tortillas tearing.
Keep the warmed tortillas covered with a clean kitchen towel while assembling the wraps.
Step 6: Assemble the Cheeseburger Crunch Wraps
Place one large tortilla on a clean, flat surface.
Add a slice of cheese to the center, followed by a portion of the warm beef. Spread the beef into a compact circle, leaving enough space around the edges for folding.
Add a spoonful of creamy burger sauce, followed by a tostada shell. If using tortilla chips, arrange a small, even layer over the filling.
Place another slice of cheese on top of the crunchy layer, then add lettuce, diced tomato, and red onion.
Do not overfill the wrap. Leaving enough space around the center makes it easier to fold and seal securely.
Step 7: Cover the Filling and Fold
Place one small tortilla over the filling. This creates a protective layer that helps keep the vegetables and sauce inside the wrap.
Fold the edges of the large tortilla toward the center, working around the filling in small sections. Overlap the folds slightly to create a closed, hexagon-like package.
If the large tortilla does not fully cover the center, use a small extra piece of tortilla to cover any exposed area before folding.
Turn the wrap over carefully so the folded side faces down. Repeat the process with the remaining ingredients.
Step 8: Toast Until Golden and Crispy
Heat a large skillet over medium heat and add a little butter or olive oil.
Place one or two wraps in the pan with the folded side facing down. Press gently with a spatula to help the folds seal.
Cook for approximately 2–4 minutes, until the bottom is golden brown and crisp. Carefully flip the wrap and cook the other side for another 2–4 minutes.
The cheese should melt, the tortilla should become crunchy, and the filling should be hot throughout. Reduce the heat if the outside browns too quickly.
Repeat with the remaining wraps, adding a little more butter or oil if necessary.
Step 9: Slice and Serve
Transfer the finished crunch wraps to a cutting board and let them rest for about one minute.
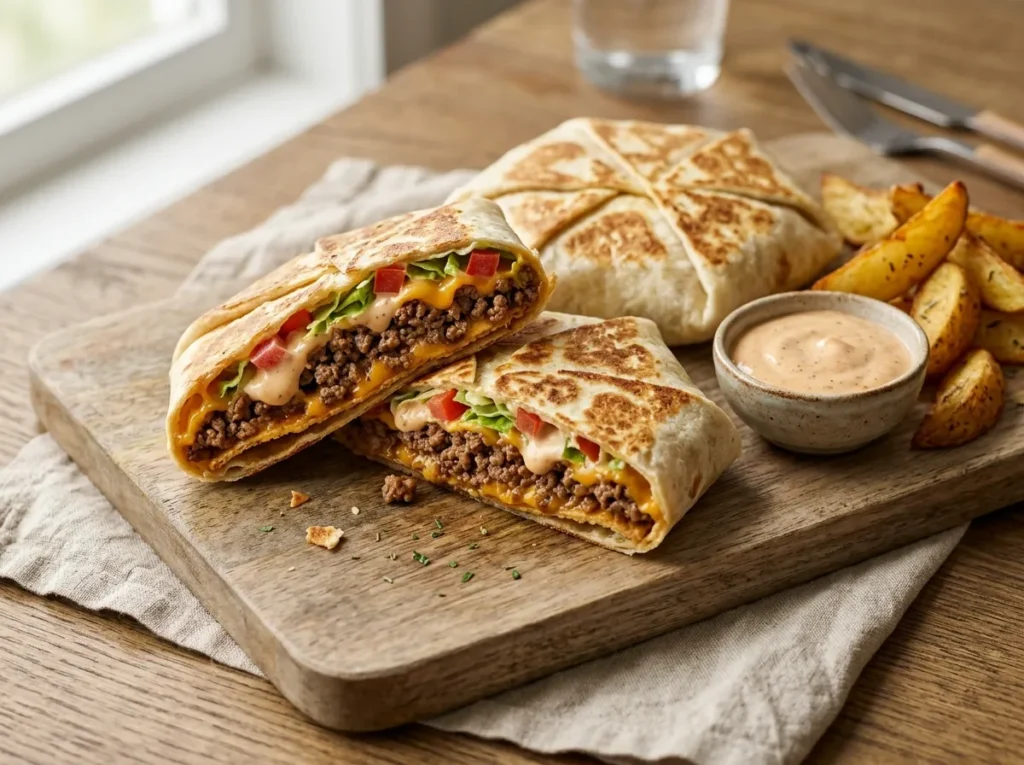
Cut each wrap in half using a sharp knife. The cross-section should reveal layers of seasoned beef, melted cheese, crunchy tortilla, fresh vegetables, and creamy sauce.
Serve immediately while the outside is crisp and the cheese is warm and gooey.
Tips and Variations for the Best Juicy Cheeseburger Crunch Wrap
Use Beef With Enough Fat
Very lean beef can produce a drier filling, especially when cooked over high heat. Ground beef with around 15–20% fat usually provides a juicy, flavorful result.
If using leaner beef, avoid overcooking it and consider adding a tablespoon of water during the final minute of cooking. Allow the liquid to reduce slightly so the filling stays moist without becoming watery.
Keep the Crunchy Layer Dry
The tostada shell provides the signature crunch. Place it between the beef and the fresh vegetables to help protect it from excess moisture.
Add lettuce and tomato shortly before folding and cooking. This helps preserve their fresh texture and prevents the wrap from becoming soggy.
Do Not Overfill the Tortillas
A generously filled wrap may look tempting, but too much filling makes it difficult to fold and seal.
Keep the ingredients in a compact circle in the center. If the tortilla edges cannot reach the middle, remove a little filling before folding.
Choose the Right Cheese
Cheddar provides a stronger, slightly sharp flavor, while American-style burger cheese melts into a particularly smooth layer.
A combination of cheddar and mozzarella also works well. The cheddar supplies flavor, while mozzarella adds extra stretchiness.
For halal-friendly preparation, check the cheese ingredients and choose products suitable for your dietary requirements.
Get a Crispy Outside Without Burning It
Medium heat is usually best for toasting the assembled wraps. High heat can brown the tortilla before the cheese melts and the center warms through.
Use a lightly greased skillet and cook each side until golden. Pressing gently with a spatula helps the folds seal and creates more even contact with the pan.
Make the Sauce Your Own
The creamy burger sauce can be adjusted to suit different tastes.
- For a spicier sauce: Add a pinch of chili powder or a little halal-friendly hot sauce.
- For a tangier sauce: Add another teaspoon of finely chopped dill pickles.
- For a smoky sauce: Increase the smoked paprika slightly.
- For a lighter sauce: Replace part of the mayonnaise with plain Greek yogurt.
- For a sweeter sauce: Add a small amount of extra ketchup.
Keep the sauce thick enough to stay inside the wrap.
Try Different Fillings
This recipe can be customized without changing the basic folding method.
Chicken cheeseburger crunch wrap: Replace the ground beef with finely chopped, fully cooked seasoned chicken.
Spicy beef crunch wrap: Add a pinch of chili flakes to the beef seasoning and serve with a spicy dipping sauce.
Mushroom cheeseburger wrap: Add finely chopped mushrooms sautéed until their excess moisture evaporates.
Vegetarian crunch wrap: Replace the beef with seasoned black beans or a suitable plant-based mince. Drain and cook the filling until it is not watery.
Extra-cheesy crunch wrap: Add a small amount of shredded cheese inside the filling, but avoid overfilling the tortilla.
Common Mistakes to Avoid
Using cold, stiff tortillas: Cold tortillas can tear when folded. Warm them briefly before assembling.
Adding too much sauce: Excess sauce can soften the tostada and make the wrap difficult to seal. Use a moderate amount and serve extra sauce on the side.
Cooking the beef too long: Overcooked beef loses moisture. Cook it until safely done, then remove it from the heat.
Flipping the wrap too early: The folds need time to seal against the pan. Start with the folded side down and wait until the bottom is golden before turning.
Using wet vegetables: Excess tomato juice can make the center soggy. Drain the diced tomato and dry the lettuce before assembly.
Storage and Serving
How to Store Leftover Crunch Wraps
Allow leftover wraps to cool slightly, then place them in an airtight container and refrigerate within two hours of cooking.
Store them at 40°F (4°C) or below and eat within 3–4 days. For the best texture, keep any extra lettuce, tomato, and sauce separate when possible.
The crunchy center will soften during storage, but reheating in a skillet or air fryer can help restore some of the crispness.
How to Reheat Cheeseburger Crunch Wraps
Skillet: Heat over medium-low heat for several minutes on each side until the tortilla becomes crisp and the filling is hot.
Air fryer: Reheat at approximately 350°F (175°C) for 4–7 minutes, turning halfway through if necessary.
Oven: Place on a baking tray and heat at 350°F (175°C) until warmed through.
Reheating times depend on the size and temperature of the wrap. Leftovers containing ground beef should reach 165°F (74°C) throughout when reheated.
The microwave can also be used for a quick reheat, but the tortilla will generally become softer rather than crispy.
Can Crunch Wraps Be Frozen?
Yes, although the texture is best when the fresh vegetables and sauce are added after reheating.
For better results, prepare the cooked beef filling in advance and freeze it separately in a suitable airtight container. Thaw it safely in the refrigerator, reheat thoroughly, and assemble the wraps with fresh lettuce, tomato, sauce, cheese, and tostada shells.
Fully assembled wraps can also be frozen, but the vegetables may lose their crispness and release moisture after thawing.
What to Serve With a Cheeseburger Crunch Wrap
These wraps are filling enough to serve on their own, but a few simple sides can turn them into a complete meal.
- Oven-baked potato wedges: Crispy potatoes complement the golden tortilla.
- Fresh coleslaw: A crunchy, tangy side balances the rich beef and cheese.
- Corn salad: Sweet corn, cucumber, and diced peppers add freshness.
- Extra burger sauce: Serve a small bowl on the side for dipping.
- Fresh cucumber sticks: These provide a cool, refreshing contrast.
- Homemade oven fries: A classic choice for a burger-inspired dinner.
For a casual family meal, slice the wraps in half and arrange them on a large platter with potato wedges and small bowls of dipping sauce.
Frequently Asked Questions
1. What Makes a Cheeseburger Crunch Wrap Different From a Regular Burger?
A cheeseburger crunch wrap uses a folded flour tortilla instead of a burger bun. It combines burger-style beef, cheese, sauce, and vegetables with a crispy inner layer, creating several textures in one handheld meal.
2. Can This Recipe Be Made Without Tostada Shells?
Yes. Use a small handful of plain tortilla chips arranged in a single layer. Choose sturdy chips and avoid crushing them too finely, as larger pieces provide more noticeable crunch.
3. How Do You Keep a Crunch Wrap Closed?
Place the small tortilla over the filling and fold the large tortilla edges inward, overlapping each fold. Cook the wrap with the folded side down first to help seal the tortilla.
Warming the tortilla before folding also makes it more flexible and easier to handle.
4. Can Cheeseburger Crunch Wraps Be Prepared Ahead of Time?
Yes. The beef filling and burger sauce can be prepared in advance and refrigerated separately.
For the best results, assemble and toast the wraps shortly before serving. This keeps the lettuce fresh and helps the crunchy layer maintain its texture.
5. Can Ground Chicken or Turkey Replace Beef?
Yes. Ground chicken or turkey works well as an alternative. Season it with the same garlic powder, onion powder, paprika, salt, and pepper.
Cook poultry mince until it reaches a safe internal temperature of 165°F (74°C).
6. Why Is the Center of My Crunch Wrap Cold?
The tortilla may be browning too quickly over high heat, leaving the center insufficiently warmed.
Reduce the heat to medium or medium-low and allow the wrap to cook longer on each side. Make sure the beef is hot before assembling and avoid placing too much cold filling inside.
7. Can Whole-Wheat Tortillas Be Used?
Yes. Large whole-wheat tortillas can be used instead of regular flour tortillas. Warm them before folding, as some varieties are less flexible and may crack more easily.
Check that the tortillas are large enough to cover the filling completely.
8. Is This Recipe Halal-Friendly?
Yes, when prepared with halal-certified ground beef, suitable cheese, and sauces that meet halal requirements. Choose alcohol-free seasonings and a Worcestershire-style product without unsuitable ingredients, or simply omit it.
Always check packaged ingredient labels when the halal status is uncertain.
9. How Can the Wrap Be Made Less Spicy?
The recipe is naturally mild. Use regular paprika instead of smoked paprika if preferred, and avoid adding chili powder or hot sauce.
A little extra lettuce and a mild creamy sauce can also soften stronger flavors.
10. Can These Wraps Be Made Without Mayonnaise?
Yes. Plain Greek yogurt can replace the mayonnaise in the burger sauce, although the flavor will be tangier and the texture less rich.
Another option is a suitable creamy salad dressing. Choose a thick variety so the sauce does not make the tortilla soggy.
11. What Size Tortillas Work Best?
Large flour tortillas around 10–12 inches wide work best for the outer wrap. A smaller tortilla around 6 inches wide helps cover the filling before the outer edges are folded inward.
If the large tortilla is too small, reduce the filling or use a larger tortilla rather than forcing the edges together.
12. How Do You Make the Wrap Extra Crispy?
Use a preheated skillet, a light coating of butter or oil, and medium heat. Cook the folded side first, then flip once the tortilla is golden.
Avoid excess sauce and watery vegetables, as moisture can soften the crunchy layer.
Conclusion
The Juicy Cheeseburger Crunch Wrap is a delicious way to enjoy classic burger flavors with an extra layer of crunch. Seasoned beef, creamy sauce, melted cheese, fresh vegetables, and a golden tortilla come together in a satisfying meal that is easy to make at home.
With simple ingredients and a straightforward folding method, this recipe is suitable for beginner cooks and busy households. The filling can also be customized with different cheeses, vegetables, and seasonings to suit individual preferences.
Serve the wraps hot from the skillet with crispy potato wedges, fresh vegetables, or extra burger sauce for dipping. The combination of juicy beef, creamy cheese, and a crisp outside makes every bite enjoyable.
Try this Juicy Cheeseburger Crunch Wrap for a quick lunch, an easy weeknight dinner, or a fun homemade alternative to fast food.