
Golden and crispy on the outside, warm and cheesy in the middle, Rollitos Rellenos are an easy stuffed-roll recipe that turns simple ingredients into something seriously delicious.
Soft tortillas are filled with seasoned chicken, creamy cheese, and colorful vegetables, then rolled tightly and cooked until the outside becomes lightly crisp and golden.
These stuffed tortilla rolls are perfect for busy home cooks because the filling takes only a few minutes to prepare. They can be baked, air-fried, or lightly pan-fried depending on the texture and cooking method preferred.
The filling is flavorful without being complicated. Tender chicken, melted cheese, sweet corn, bell pepper, onion, and simple spices create a savory mixture that tastes satisfying in every bite.
Rollitos Rellenos also make a flexible recipe. The chicken can be replaced with cooked beef, shredded turkey, or extra vegetables. The spice level can be adjusted easily, making them suitable for both family dinners and casual gatherings.
Serve them with fresh salsa, creamy yogurt dip, guacamole, or a simple green salad. They are delicious straight from the oven while the cheese is still soft and stretchy.
This recipe is completely alcohol-free and halal-friendly. Use halal-certified chicken and check packaged tortillas, cheese, sauces, and seasonings to make sure they meet dietary requirements.
Ingredients
For the Filling
- 2 tablespoons olive oil
- 1 pound boneless, skinless chicken breast, finely diced
- 1/2 small yellow onion, finely diced
- 1 small red bell pepper, finely diced
- 2 cloves garlic, minced
- 1 teaspoon ground cumin
- 1 teaspoon smoked paprika
- 1/2 teaspoon chili powder
- 1/2 teaspoon salt
- 1/4 teaspoon black pepper
- 1/2 cup canned sweet corn, drained
- 1/4 cup chopped fresh cilantro
- 1 tablespoon fresh lime juice
For the Rollitos
- 12 small flour or corn tortillas, about 6 inches each
- 1 1/2 cups shredded Monterey Jack cheese
- 1/2 cup shredded cheddar cheese
- 2 tablespoons olive oil, for brushing
For Serving
- 1/2 cup sour cream
- 1/2 cup fresh salsa
- 1/2 cup guacamole
- Lime wedges
- 2 tablespoons chopped fresh cilantro
Equipment
- Large skillet
- Large spoon or spatula
- Cutting board
- Sharp knife
- Mixing bowl
- Baking sheet
- Parchment paper
- Pastry brush
- Tongs
How to Make Rollitos Rellenos
1. Prepare the oven
Preheat the oven to 425°F (220°C).
Line a large baking sheet with parchment paper. This helps prevent sticking and makes cleanup easier.
2. Cook the chicken
Heat 2 tablespoons of olive oil in a large skillet over medium-high heat.
Add the diced chicken and cook for 5 to 7 minutes, stirring occasionally, until the chicken is cooked through and lightly golden.
3. Add the vegetables
Add the diced onion and red bell pepper to the skillet.
Cook for 3 to 4 minutes, stirring occasionally, until the vegetables become tender but still have a little bite.
4. Season the filling
Add the minced garlic, cumin, smoked paprika, chili powder, salt, and black pepper.
Cook for 30 to 60 seconds, stirring constantly, until the garlic becomes fragrant.
5. Finish the filling
Stir in the drained corn and chopped cilantro.
Turn off the heat and add the fresh lime juice.
Mix well, then transfer the filling to a bowl and allow it to cool for about 5 minutes.
The filling should be warm but not extremely hot when the cheese and tortillas are assembled.
6. Warm the tortillas
Warm the tortillas in a dry skillet for about 10 to 15 seconds per side.
Alternatively, wrap them in a slightly damp kitchen towel and microwave for about 20 to 30 seconds.
Warm tortillas are softer and much easier to roll without cracking.
7. Fill the tortillas
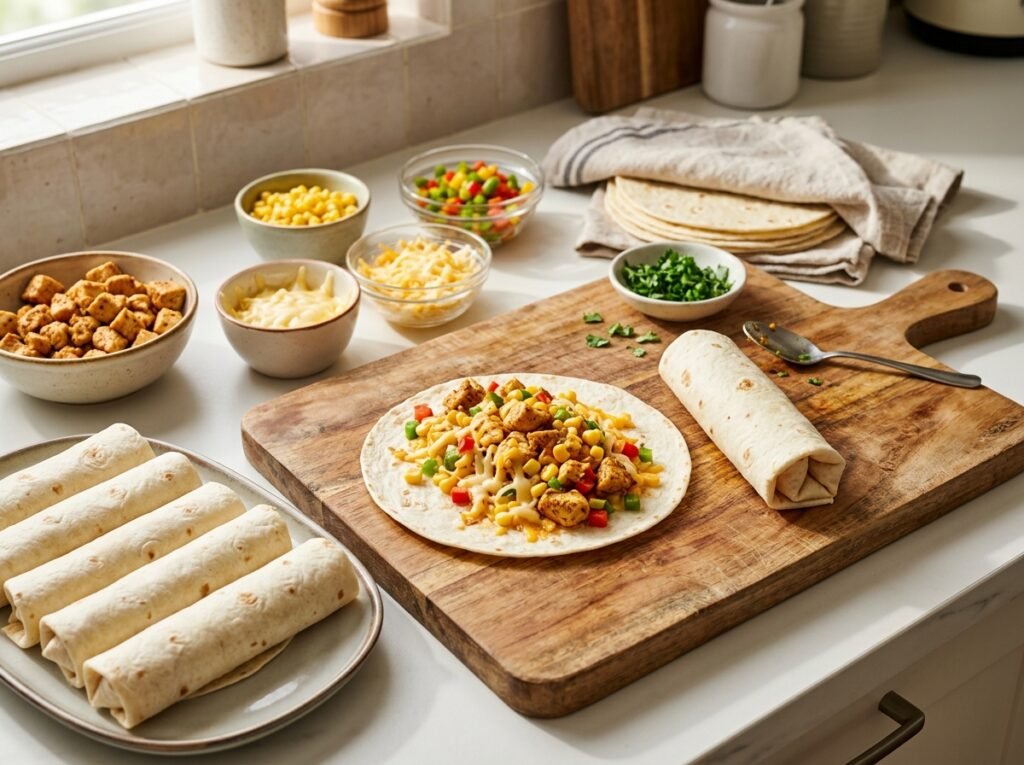
Place one tortilla flat on a clean work surface.
Add about 2 tablespoons of the chicken filling across the lower third of the tortilla.
Sprinkle with about 2 tablespoons of Monterey Jack and cheddar cheese.
Do not overfill. Too much filling can make the roll difficult to close.
8. Roll tightly
Fold the bottom edge of the tortilla over the filling.
Fold in both sides, then roll it forward tightly until a compact cylinder forms.
Place the roll seam-side down on the prepared baking sheet.
Repeat with the remaining tortillas and filling.
9. Brush with oil
Arrange the rollitos in a single layer with a little space between each one.
Lightly brush the tops and sides with the remaining 2 tablespoons of olive oil.
This helps the tortillas become crisp and golden in the oven.
10. Bake until golden
Bake for 15 to 18 minutes.
Turn the rollitos halfway through cooking if desired for more even browning.
They are ready when the outside is crisp and golden and the cheese inside is melted.
11. Rest briefly
Remove the baking sheet from the oven.
Let the Rollitos Rellenos rest for about 3 minutes before serving.
This gives the melted cheese a moment to settle and makes the rolls easier to handle.
12. Serve
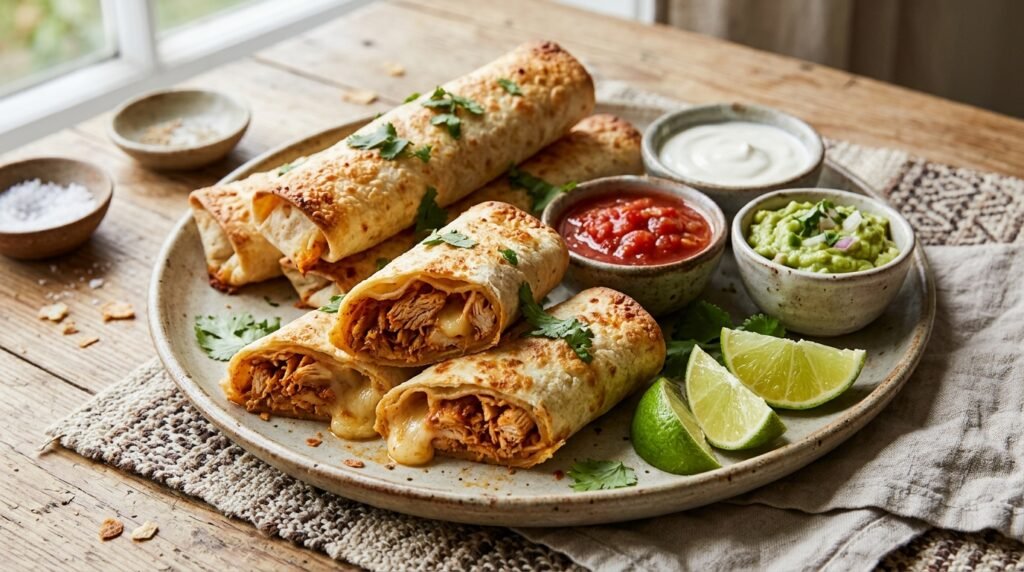
Arrange the warm rollitos on a serving plate.
Add sour cream, fresh salsa, guacamole, lime wedges, and chopped cilantro on the side.
Serve immediately while the tortilla edges are crispy and the filling is warm and cheesy.
Tips & Variations
Don’t overfill the tortillas
A smaller amount of filling creates tighter, neater rolls.
Overfilled tortillas can split during rolling or cause the filling to spill out during baking.
Warm the tortillas first
Cold tortillas are more likely to crack when folded.
A few seconds of gentle heating makes them flexible enough to roll tightly.
Let the filling cool slightly
Very hot filling can soften the tortillas before they reach the oven.
Allow the cooked chicken mixture to cool briefly before adding it to the tortillas.
Use freshly shredded cheese
Freshly shredded Monterey Jack and cheddar melt smoothly and create a creamy center.
Pre-shredded cheese can also work, but freshly grated cheese often gives a softer, more even melt.
Keep the rolls seam-side down
Place each roll seam-side down on the baking sheet.
This helps keep the shape intact while the tortillas become crisp.
Make them extra crispy
For a crunchier exterior, lightly brush the tortillas with oil before baking.
An air fryer also works well. Cook the rollitos at 390°F (200°C) for about 8 to 10 minutes, turning them halfway through.
Make them spicy
Add finely chopped jalapeño to the chicken filling.
A pinch of cayenne pepper or a drizzle of hot sauce can also increase the heat.
For a milder version, leave out the chili powder and jalapeño.
Use shredded beef
Cooked shredded halal beef can replace the chicken.
Season it with cumin, smoked paprika, garlic, salt, and black pepper before mixing it with the vegetables.
Try a vegetarian filling
Replace the chicken with 1 1/2 cups of cooked black beans.
Add extra corn, bell peppers, onion, and cheese for a hearty meat-free version.
Add creamy filling
For extra richness, mix 2 tablespoons of softened cream cheese into the cooled chicken filling.
The center will become especially creamy and soft after baking.
Add black beans
For a more filling meal, add 1/2 cup drained and rinsed black beans to the chicken mixture.
Mash a few beans lightly with the back of a spoon so the filling holds together better.
Choose corn or flour tortillas
Corn tortillas provide a more traditional toasted flavor and crisp texture.
Small flour tortillas are softer and easier to roll. Both work well, so the choice depends on the preferred texture.
Avoid watery ingredients
Wet salsa, undrained corn, or juicy vegetables can make the filling soggy.
Drain canned ingredients thoroughly and avoid adding large amounts of sauce to the filling.
Don’t overcrowd the baking sheet
Leave a little space between the rolls so hot air can circulate.
Crowding can cause the tortillas to steam instead of becoming crisp.
Watch the baking time
Every oven is slightly different.
Start checking the rollitos around the 14-minute mark. Once the tortillas are golden and crisp, they are ready.
Storage & Serving
Rollitos Rellenos taste best fresh from the oven, when the tortillas are crisp and the cheese is soft and melted.
If leftovers remain, allow them to cool before placing them in an airtight container.
Store them in the refrigerator for up to 3 to 4 days.
For the best texture, reheat them in an oven or air fryer rather than the microwave.
To reheat in the oven, place the rollitos on a baking sheet and cook at 375°F (190°C) for about 8 to 12 minutes.
In an air fryer, heat them at 375°F (190°C) for about 5 to 7 minutes, turning once if needed.
Microwave reheating is faster but produces a softer tortilla.
The assembled uncooked rollitos can also be frozen. Arrange them on a tray and freeze until firm, then transfer them to a freezer-safe container.
For best quality, use frozen rollitos within 2 months.
Bake frozen rollitos at 400°F (200°C) until hot and crisp, adding a few extra minutes to the cooking time.
For serving, place small bowls of salsa, guacamole, sour cream, and lime wedges around the platter.
A crisp lettuce salad, Mexican-style rice, black beans, or roasted vegetables can turn the rollitos into a complete meal.
They also work beautifully as a party appetizer. Cut larger rolls in half and arrange them with several dipping sauces for easy sharing.
Frequently Asked Questions
What does Rollitos Rellenos mean?
“Rollitos Rellenos” translates roughly to “stuffed little rolls.”
The name can describe different regional dishes, but this recipe uses tortillas filled with seasoned chicken, vegetables, and melted cheese.
Can Rollitos Rellenos be made in an air fryer?
Yes. Air frying is an excellent way to achieve a crispy outside with less oil.
Cook at 390°F (200°C) for approximately 8 to 10 minutes, turning halfway through.
Why are the tortillas cracking?
Tortillas usually crack when they are too cold or dry.
Warm them briefly before filling and rolling. If using corn tortillas, gentle heating makes a particularly big difference.
Can the filling be prepared ahead?
Yes. The chicken filling can be cooked up to 2 days ahead and stored in the refrigerator.
Bring it out shortly before assembling the rollitos so it is easier to work with.
What cheese is best for stuffed tortilla rolls?
Monterey Jack melts smoothly and has a mild, creamy flavor.
Cheddar adds more sharpness. A combination of both gives the filling a good balance.
Can these be made gluten-free?
Yes. Use certified gluten-free corn tortillas or gluten-free tortillas suitable for rolling.
Check the labels on all packaged ingredients if preparing the recipe for someone with gluten intolerance or celiac disease.
Can Rollitos Rellenos be made without dairy?
Yes. Use a dairy-free shredded cheese that melts well and replace sour cream with a dairy-free alternative.
The chicken and vegetable filling remains flavorful without regular cheese.
How do you keep the filling from falling out?
Avoid overfilling each tortilla and roll it firmly.
Placing the rolls seam-side down also helps keep the filling contained during baking.
Can leftover cooked chicken be used?
Yes. Cooked shredded or diced chicken makes a convenient shortcut.
Use about 3 cups of cooked chicken and warm it with the vegetables and seasonings before assembling.
What dipping sauce goes best with Rollitos Rellenos?
Fresh salsa, guacamole, sour cream, and creamy cilantro-lime sauce all pair well with the crispy rolls.
For extra heat, serve a spicy tomato salsa or jalapeño sauce on the side.
Conclusion
Crispy tortillas, tender seasoned chicken, sweet corn, colorful vegetables, and gooey melted cheese make these stuffed rolls a simple but satisfying meal.
Rollitos Rellenos are easy enough for a busy weeknight and versatile enough for parties, lunches, snacks, or casual family dinners.
The filling can be changed to suit different tastes, while baking or air frying creates a deliciously crisp exterior without complicated cooking.
Serve them hot with salsa, guacamole, sour cream, and fresh lime for a flavorful meal that is easy to prepare and even easier to enjoy. Give Rollitos Rellenos a try and add a favorite filling to make the recipe your own.