This caramel apple upside-down cake bakes with a buttery caramel and apple layer on the bottom, then flips out of the pan to reveal a glossy, caramelized apple topping. Underneath, the cake itself is soft, moist, and lightly spiced with cinnamon and nutmeg, with the caramel juices soaking into the crumb as it bakes. It’s a classic fall dessert that looks like it took real effort, but comes together with a straightforward batter and a single stovetop step.
Recipe at a Glance
- Prep Time: 25 minutes
- Cook Time: 40–46 minutes
- Total Time: 1 hour, 30 minutes
- Servings: 8–10
- Difficulty: Beginner-friendly
- Cuisine: American
- Recipe Category: Dessert / Cake
Why You’ll Love This Caramel Apple Upside-Down Cake
- The caramel-apple topping bakes right into the cake, so there’s no separate frosting or decorating step.
- It uses simple pantry ingredients — no specialty tools or hard-to-find items.
- The cinnamon-spiced crumb stays moist thanks to the caramel juices seeping in as it bakes.
- It’s sized for a small gathering, so you don’t end up with a giant cake to store.
Ingredients
Caramel Apple Topping
- 6 tablespoons (85g) unsalted butter
- 1/2 cup (100g) packed light or dark brown sugar
- 1/4 teaspoon ground cinnamon
- 1/4 teaspoon pure vanilla extract
- 2 medium apples (Granny Smith, Fuji, or Honeycrisp), peeled and sliced into 1/4-inch slices (about 1.5–2 cups sliced)
Cake
- 1 1/2 cups (188g) all-purpose flour, spooned and leveled
- 1 1/2 teaspoons baking powder
- 1 1/2 teaspoons ground cinnamon
- 1/4 teaspoon ground nutmeg
- 1/2 teaspoon salt
- 1/2 cup (113g) unsalted butter, softened to room temperature
- 1/2 cup (100g) granulated sugar
- 1/2 cup (100g) packed light or dark brown sugar
- 2 large eggs, at room temperature
- 1 teaspoon pure vanilla extract
- 6 tablespoons (90ml) whole milk, at room temperature
Equipment
- 9-inch pie dish or round cake pan, at least 2 inches deep
- Small saucepan
- Whisk
- Mixing bowls
- Handheld or stand mixer
- Rubber spatula
- Aluminum foil
- Cooling rack
- Serving plate or cake stand
Step-by-Step Instructions
- Preheat the oven to 350°F (177°C).
- In a small saucepan over medium heat, combine 6 tablespoons of butter and 1/2 cup brown sugar. Whisk occasionally until the butter melts, then continue whisking constantly for about 1 minute as the mixture thickens and takes on a caramel color. Remove from heat and whisk in the cinnamon and vanilla extract.
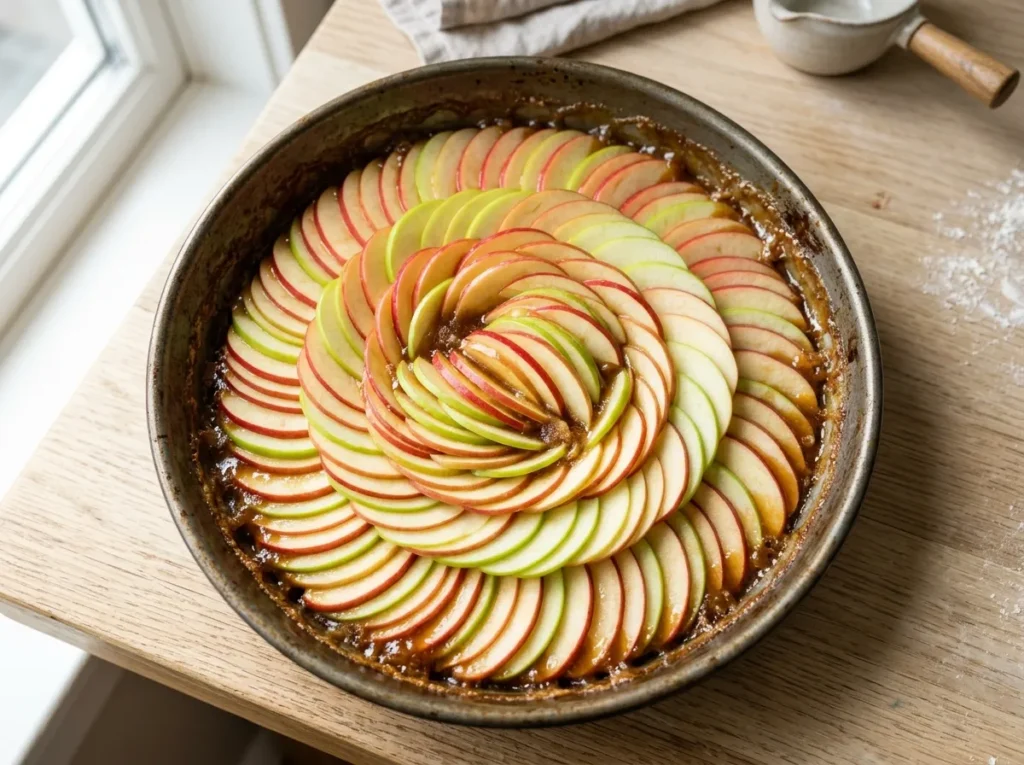
- Pour the caramel into an ungreased 9-inch pie dish or cake pan (at least 2 inches deep). Arrange the apple slices tightly over the caramel, overlapping as needed to fit as many slices as possible. Place the pan in the refrigerator for a few minutes while you make the batter — this helps the apples stay in place.
- In a medium bowl, whisk together the flour, baking powder, cinnamon, nutmeg, and salt. Set aside.
- Using a mixer, beat the softened butter on high speed until smooth, about 1 minute. Add the granulated sugar and brown sugar and beat until creamed together. Scrape down the bowl as needed.
- Beat in the eggs and vanilla extract until combined, scraping the bowl again as needed.
- With the mixer on low speed, add the dry ingredients and slowly pour in the milk. Mix just until combined — the batter will be fairly thick. Do not overmix.
- Remove the pan from the refrigerator. Spread the batter evenly over the apple layer, smoothing the top gently.
- Bake for 40–46 minutes, tenting the top loosely with foil about halfway through to keep it from browning too quickly. The cake is done when a toothpick inserted in the center comes out mostly clean, with a few moist crumbs still clinging to it. It’s normal for the cake to rise up and touch the foil.
- Remove the cake from the oven and let it cool in the pan on a wire rack for 15 minutes — no longer. While it’s still warm, invert it onto a serving plate or cake stand. Some caramel juices may run down the sides; that’s expected.
- Let the cake cool completely at room temperature before slicing for clean cuts. It can be served slightly warm, but the slices will be messier.
Recipe-Specific Tips
- Simmer the caramel for the full minute after the butter melts — this short cooking time is what gives it real caramel flavor instead of just melted butter and sugar.
- Slice the apples thinly and evenly so they bake through at the same rate as the cake.
- Place a baking sheet on the rack below the cake in case the caramel bubbles over the sides.
- Invert the cake while it’s still slightly warm, not fully cooled — this keeps it from sticking to the pan.
Common Mistakes
- Using a pan that’s too shallow: The topping needs room to bubble up as it bakes. A pan under 2 inches deep is more likely to overflow.
- Letting the cake cool too long before flipping: If it sits too long, the caramel can set and cause the cake to stick to the pan.
- Overmixing the batter: This can make the crumb tougher instead of soft and tender.
- Slicing right after inverting: The cake is easiest to cut cleanly once it has cooled to room temperature; warm slices tend to fall apart.
Substitutions
- Apples: Granny Smith, Fuji, or Honeycrisp all work well; any firm baking apple is a reasonable substitute.
- Milk: Whole milk gives the best texture, but a lower-fat milk or unsweetened non-dairy milk can be used if needed.
- Brown sugar: Light and dark brown sugar can be used interchangeably; dark brown sugar will give a slightly deeper caramel flavor.
Storage and Reheating
Cover leftover slices and store in the refrigerator for up to 3 days, or in the freezer for up to 3 months. Thaw frozen slices at room temperature before serving. This cake is best sliced and stored after serving rather than frozen whole, since the apple topping can shift out of place when thawed.
Serving Suggestions
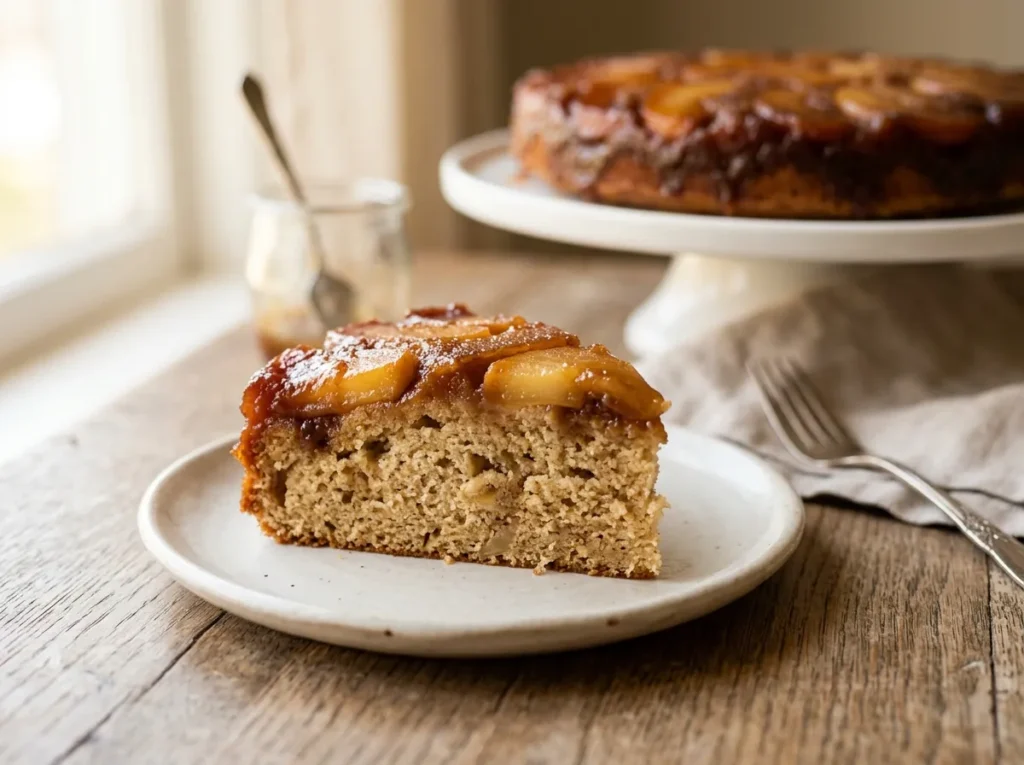
Serve slices on their own, or add a scoop of vanilla ice cream or a dollop of lightly sweetened whipped cream on the side. It also pairs well with a warm drink like coffee or spiced tea for a fall dessert table.
FAQ
Can I make this cake ahead of time?
The caramel topping can be prepared and refrigerated up to a day in advance. The dry and wet cake ingredients can also be prepped separately ahead of time. However, the fully baked cake is best enjoyed the day it’s made, since the apple topping can settle if it sits too long before serving.
Do I need to peel the apples?
Yes, peeling the apples gives the topping a smoother, more tender texture once baked.
Why did my apples sink into the cake?
Some settling is normal, especially if the cake sits for a while before serving. If the sinking is significant, the cake may have needed a few more minutes in the oven, since an underbaked cake can’t fully support the topping once inverted.
Can I bake this in a different pan?
A round cake pan or pie dish at least 2 inches deep works well. A cast iron skillet (10 inches or larger) is also a suitable option.
Conclusion
This caramel apple upside-down cake turns a short list of pantry ingredients into a dessert that looks far more impressive than the effort it takes. The flip at the end does all the decorating for you, making it a reliable choice for fall gatherings or a simple weeknight treat.