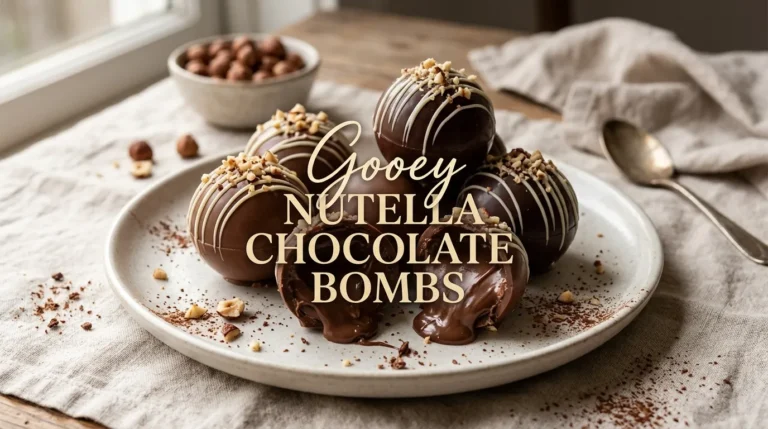
Soft and gooey Nutella chocolate bombs are an irresistible homemade treat filled with creamy chocolate hazelnut spread and wrapped in a delicious chocolate shell. Each bite offers a satisfying snap on the outside, followed by a smooth, rich Nutella center that melts in the mouth. These little chocolate treats look impressive but are surprisingly simple to make at home.
Perfect for parties, holidays, dessert platters, or an everyday chocolate craving, Nutella chocolate bombs require just a handful of ingredients. Melted chocolate forms the outer shell, while Nutella creates the creamy filling. A drizzle of white chocolate, chocolate sprinkles, or crushed hazelnuts adds a beautiful finishing touch.
This recipe uses a simple chocolate-mold method to create neat, bite-sized treats with a soft, gooey center. With a little chilling time and a few easy steps, these homemade chocolate bombs can become a favorite for chocolate lovers of all ages.
Why You’ll Love These Nutella Chocolate Bombs
- Rich Nutella filling: Every chocolate bomb has a creamy chocolate hazelnut center.
- Easy to make: Simple ingredients and a silicone mold make the process beginner-friendly.
- Perfect bite-sized dessert: These small treats are ideal for parties, gifting, and dessert tables.
- Beautiful chocolate finish: Add melted white chocolate, sprinkles, or chopped hazelnuts for decoration.
- Customizable: Use milk chocolate, dark chocolate, or a combination of both.
- Make-ahead friendly: Prepare the chocolate bombs in advance and chill until ready to serve.
- No oven needed: The chocolate shells set in the refrigerator, so baking is unnecessary.
Ingredients for Soft & Gooey Nutella Chocolate Bombs
This recipe makes approximately 12 chocolate bombs, depending on the size of the mold.
For the Chocolate Shells
- 300 g milk chocolate or semi-sweet chocolate, finely chopped
- 1 teaspoon coconut oil, optional, for a smoother coating
For the Nutella Filling
- ½ cup (150 g) Nutella or chocolate hazelnut spread
- 2 tablespoons (30 ml) heavy cream, optional, for a softer filling
- 2 tablespoons (15 g) finely chopped roasted hazelnuts, optional
For Decoration
- 40 g white chocolate, melted
- 1 tablespoon chocolate sprinkles, optional
- 1 tablespoon finely chopped hazelnuts, optional
Ingredient tip: Choose good-quality chocolate that melts smoothly. For a firmer shell, use chocolate suitable for candy making or temper the chocolate correctly. Coconut oil can help with melting and coating, but it does not replace tempering when a crisp, glossy finish is desired.
Equipment Needed
- Silicone half-sphere chocolate mold
- Heatproof bowl
- Small saucepan or microwave
- Silicone spatula or spoon
- Small piping bag or zip-top bag
- Teaspoon
- Refrigerator-safe tray
- Small offset spatula or the back of a spoon
How to Make Soft & Gooey Nutella Chocolate Bombs
Step 1: Melt the Chocolate
Finely chop the milk or semi-sweet chocolate and place it in a heatproof bowl. Melt it in the microwave in 15–20-second intervals, stirring after each interval until smooth. Alternatively, place the bowl over a saucepan of gently simmering water, making sure the bottom of the bowl does not touch the water.
If desired, stir in the coconut oil to make the chocolate slightly easier to spread. Let the chocolate cool briefly if it feels very hot before using it in the mold.
For a shinier, snappier shell that stays firm at room temperature, temper the chocolate according to the type of chocolate being used.
Step 2: Coat the Silicone Mold
Place the silicone mold on a flat tray so it is easy to move. Spoon a small amount of melted chocolate into each cavity.
Use the back of a spoon or a small brush to spread the chocolate across the bottom and sides of each cavity. Make sure there are no thin or uncovered spots, especially around the edges.
Refrigerate the mold for 10–15 minutes, or until the chocolate has set.
Step 3: Add a Second Chocolate Layer
Check the shells carefully. If any areas look thin or translucent, brush on a second thin layer of melted chocolate.
Return the mold to the refrigerator for another 10–15 minutes, until the shells are firm. A second layer helps prevent cracks when the chocolate bombs are removed from the mold.
Step 4: Prepare the Nutella Filling
Add the Nutella to a small bowl. For a softer, creamier filling, stir in the heavy cream until smooth. Add the chopped roasted hazelnuts if desired.
For the easiest assembly and a more stable filling, use Nutella on its own. If cream is added, the filling becomes more perishable and should be kept refrigerated.
Transfer the filling to a small piping bag or use a teaspoon to portion it neatly into the chocolate shells.
Step 5: Fill the Chocolate Shells
Remove the set chocolate shells from the refrigerator. Pipe or spoon the Nutella filling into each shell, leaving about 3–4 mm of space at the top.
Avoid overfilling the shells because the filling needs to stay below the rim. If Nutella gets on the edges, wipe it away with a clean, dry fingertip or small spatula. Clean edges help the chocolate bombs seal properly.
Step 6: Seal the Chocolate Bombs
Rewarm the remaining melted chocolate gently if it has started to thicken. Spoon a thin layer over the filling in each cavity, spreading the chocolate to the edges to seal the shell completely.
Smooth the base with a spatula, removing excess chocolate from the mold. This helps create an even bottom and makes the finished bombs easier to handle.
Refrigerate for 20–30 minutes, or until completely firm.
Step 7: Remove the Chocolate Bombs
Once set, gently peel the silicone mold away from each chocolate bomb. Avoid squeezing the shells too hard, as the chocolate may crack.
Place the finished bombs on a parchment-lined tray. If a small opening or crack appears, use a little melted chocolate to patch it, then chill again until firm.
Step 8: Decorate and Serve
Drizzle the chocolate bombs with melted white chocolate. While the drizzle is still wet, sprinkle on chopped hazelnuts or chocolate sprinkles.
Allow the decorations to set before arranging the chocolate bombs on a serving plate or placing them in small candy cups.
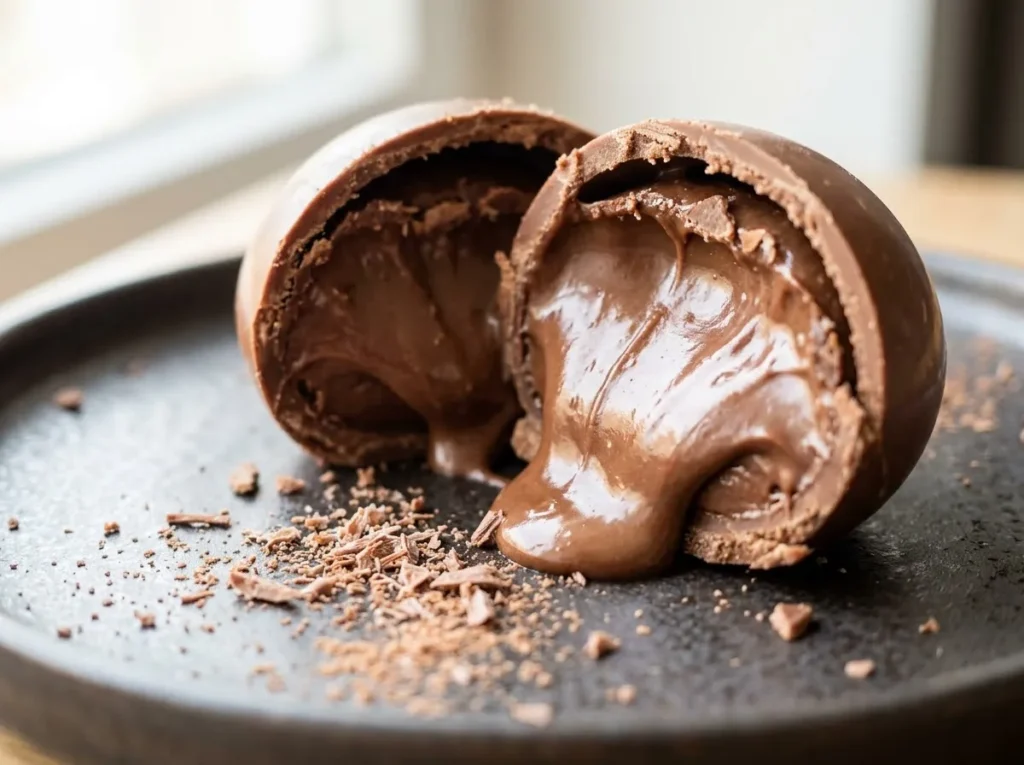
For the best texture, let the bombs sit at cool room temperature for a few minutes before serving. The Nutella filling will be softer and creamier when it is not straight from the refrigerator.
Tips for the Best Nutella Chocolate Bombs
- Use a clean, dry mold: Even a little water can cause melted chocolate to seize.
- Make the shells thick enough: Two thin coats of chocolate are usually more reliable than one very thin coat.
- Leave space for sealing: Keep the Nutella filling below the rim so the shells close completely.
- Avoid overheating chocolate: Melt it slowly and stir frequently to maintain a smooth texture.
- Choose the right chocolate: Chocolate made for melting or candy work is easier to handle. Tempering helps create a glossy, crisp shell.
- Keep the edges clean: Nutella on the rims can prevent the chocolate shells from sealing.
- Chill until fully firm: Removing the bombs too early can cause cracks or dents.
- Handle gently: Warm hands can soften the chocolate, so work quickly and use candy cups if needed.
- Adjust the filling texture: Nutella alone gives a thicker center, while a little cream makes it softer but also more perishable.
Variations and Substitutions
Dark Chocolate Nutella Bombs
Use dark chocolate for the outer shell to balance the sweetness of the Nutella filling. This version has a deeper chocolate flavor and works especially well with a white chocolate drizzle.
White Chocolate Nutella Bombs
Replace the milk chocolate shell with white chocolate. The result is sweeter and creamier, with a pretty contrast when decorated with dark chocolate.
Crunchy Hazelnut Chocolate Bombs
Fold finely chopped roasted hazelnuts into the Nutella filling. The nuts add a pleasant crunch and bring out the hazelnut flavor of the spread.
Peanut Butter Chocolate Bombs
Replace part of the Nutella filling with smooth peanut butter. A mixture of ¼ cup Nutella and ¼ cup peanut butter creates a rich, nutty center.
Caramel Nutella Chocolate Bombs
Add a small amount of thick caramel sauce to the center before sealing. Use only a little so the filling does not leak through the chocolate shell.
Biscuit Crunch Chocolate Bombs
Mix 2 tablespoons of finely crushed biscuits into the Nutella filling for extra texture. Keep the crumbs small so the filling remains easy to pipe or spoon.
Mini Nutella Chocolate Bombs
Use a smaller silicone mold and reduce the filling in each cavity. Mini chocolate bombs are ideal for party platters, lunchbox treats, and edible gifts.
What to Serve With Nutella Chocolate Bombs
Nutella chocolate bombs pair beautifully with drinks and desserts that complement their rich chocolate hazelnut flavor.
- Coffee or espresso: The slightly bitter flavor balances the sweet filling.
- Cold milk: A classic choice for chocolate desserts.
- Hot chocolate: Perfect for a cozy chocolate-themed dessert platter.
- Fresh strawberries: Their fruity freshness contrasts with the rich chocolate shell.
- Banana slices: Banana and chocolate hazelnut spread make a delicious combination.
- Vanilla ice cream: Serve one or two chocolate bombs alongside a scoop for an easy plated dessert.
- Crushed roasted hazelnuts: Sprinkle around the serving plate for extra crunch.
- Fresh raspberries: Their tartness adds a refreshing contrast.
How to Store Nutella Chocolate Bombs
Refrigerator Storage
Store the chocolate bombs in an airtight container in the refrigerator. Chocolate bombs filled with plain Nutella can generally be kept for up to 1–2 weeks when handled with clean, dry utensils and stored properly.
If the filling contains heavy cream or other perishable ingredients, keep the bombs refrigerated and use them within 3–4 days. Follow the storage guidance for any ingredients used.
Room Temperature Storage
Chocolate bombs with a plain Nutella filling can be kept in a cool, dry place for a short period if the chocolate shell is properly set and the room is not warm. In hot weather, refrigeration is the safer choice to prevent the chocolate from softening.
Avoid leaving cream-filled chocolate bombs at room temperature for more than 2 hours, or 1 hour when temperatures are above 32°C (90°F).
Freezer Storage
For longer storage, freeze the chocolate bombs in a single layer until firm, then transfer them to a freezer-safe airtight container. For best quality, use within 1–2 months.
Thaw them in the refrigerator while still covered to reduce condensation on the chocolate shell. The surface may lose some shine after thawing.
Frequently Asked Questions
1. What are Nutella chocolate bombs?
Nutella chocolate bombs are bite-sized chocolate treats made with a firm chocolate shell and a creamy Nutella filling. They can be decorated with drizzled chocolate, chopped nuts, or sprinkles.
2. Do I need a special mold to make chocolate bombs?
A silicone half-sphere mold is the easiest option because it helps create evenly shaped shells and makes removal simpler. Small silicone candy molds can also be used.
3. Can I make Nutella chocolate bombs without coconut oil?
Yes. Coconut oil is optional. Melted chocolate works on its own, although tempering the chocolate can help create a smoother, shinier, and firmer shell.
4. Why are my chocolate bombs cracking?
The shells may be too thin, the chocolate may not have fully set, or the bombs may be removed too forcefully. Apply two coats if necessary, chill thoroughly, and peel the mold away gently.
5. How do I make the Nutella filling extra gooey?
Use Nutella at room temperature, or mix in a small amount of heavy cream for a softer center. Cream makes the filling more perishable, so the finished treats must be refrigerated.
6. Can I use white chocolate instead of milk chocolate?
Yes. White chocolate makes a sweeter shell, while dark chocolate creates a richer, less-sweet contrast. Choose chocolate suitable for melting and follow its melting or tempering instructions.
7. How long do Nutella chocolate bombs take to set?
The shells usually need 10–15 minutes per chilling stage, while the filled and sealed bombs need around 20–30 minutes. Exact times depend on the mold, chocolate thickness, and refrigerator temperature.
8. Can I make Nutella chocolate bombs ahead of time?
Yes. Prepare them a few days in advance and store them in an airtight container. If the filling contains cream, keep them refrigerated and use them within 3–4 days.
9. How do I stop the filling from leaking?
Do not overfill the shells, keep the edges clean, and cover the filling with enough melted chocolate to seal the entire rim. Allow the bombs to set completely before removing them from the mold.
10. Can I use a different chocolate hazelnut spread?
Yes. Another smooth chocolate hazelnut spread can be used in the same amount. The sweetness and consistency may vary, so adjust the filling as needed.
11. Are Nutella chocolate bombs suitable for gifting?
Yes. Place fully set chocolate bombs in small paper candy cups and arrange them in a sturdy gift box. Keep them cool during transport, especially in warm weather.
12. Can I make these chocolate bombs nut-free?
Nutella contains hazelnuts, so it is not suitable for people with hazelnut allergies. For a nut-free version, use a suitable chocolate spread that is clearly labeled nut-free and check all ingredient labels for allergen and cross-contact warnings.
Conclusion
Soft and gooey Nutella chocolate bombs are a delicious homemade treat with a crisp chocolate shell and a smooth, creamy hazelnut center. They are easy to customize, require no baking, and look beautiful on dessert platters or in gift boxes.
With a few simple ingredients, a silicone mold, and a little chilling time, these bite-sized chocolate treats are perfect for parties, holidays, and everyday sweet cravings. Add a white chocolate drizzle or chopped hazelnuts, let the shells set completely, and enjoy every rich, chocolatey bite.