Cheesy Beef Tortilla Skewers combine juicy, seasoned beef, gooey melted cheese, and golden tortilla pieces in one delicious, easy-to-serve meal. Each bite delivers a satisfying mix of savory beef, soft melted cheese, and lightly crispy tortilla edges.
These fun skewers are perfect for family dinners, weekend gatherings, game-day snacks, and casual parties. They look impressive on a serving platter but require simple ingredients and straightforward preparation.
The best part is that there is no need for complicated cooking techniques. Ground beef is seasoned with everyday spices, combined with cheese, and wrapped in soft tortillas before being threaded onto skewers and cooked until golden.
This recipe is also easy to customize. Add bell peppers for freshness, use your favorite halal-friendly cheese, or adjust the spices to suit your family’s taste. Serve the skewers with a creamy garlic dip, fresh salad, or homemade salsa for a complete meal.
Whether cooked in the oven, air fryer, or on a grill, Cheesy Beef Tortilla Skewers are a delicious way to turn familiar ingredients into something a little more exciting.
Ingredients for Cheesy Beef Tortilla Skewers
This recipe makes approximately 8 skewers and serves 4 people, depending on portion size. Use medium-sized flour tortillas that are soft enough to roll without cracking.
For the Beef Filling
- 500 g (1.1 lb) lean ground beef, halal-certified
- 1 tablespoon olive oil
- 1 small onion, finely chopped
- 2 garlic cloves, minced
- 1 teaspoon paprika
- 1 teaspoon ground cumin
- 1 teaspoon garlic powder
- ½ teaspoon ground black pepper
- ¾ teaspoon salt, or to taste
- ½ teaspoon chili powder, optional
- 2 tablespoons tomato paste
- 2 tablespoons water
For the Tortilla Skewers
- 4 medium flour tortillas, approximately 8 inches each
- 1½ cups (150 g) shredded cheddar cheese, halal-friendly
- ½ cup (55 g) shredded mozzarella cheese, halal-friendly
- 1 small red bell pepper, finely diced, optional
- 1 tablespoon olive oil, for brushing
For Serving
- ½ cup plain Greek yogurt
- 1 tablespoon mayonnaise
- 1 teaspoon lemon juice
- 1 small garlic clove, finely grated
- 1 tablespoon chopped fresh parsley or cilantro
- A small pinch of salt
Use halal-certified beef and cheese made with suitable microbial or halal-certified rennet. Check packaged sauces and seasonings for alcohol-derived ingredients when needed.
Equipment Needed
- Large nonstick skillet
- Wooden spoon or heat-resistant spatula
- Sharp knife and cutting board
- Mixing bowl
- Measuring spoons and cups
- Eight heat-safe metal skewers or appropriately prepared wooden skewers
- Baking tray
- Parchment paper
- Pastry brush
- Oven or air fryer
- Food thermometer
If using wooden skewers, soak them in water for at least 20–30 minutes before oven or grill cooking, and check that they are suitable for the chosen cooking method. Do not place wooden skewers in an air fryer unless the appliance manufacturer permits it.
How to Make Cheesy Beef Tortilla Skewers
These tortilla skewers are easy to prepare in stages. Cook the beef first, allow the filling to cool slightly, then assemble and cook the skewers until the tortillas turn golden and the cheese melts.
Step 1: Cook the Ground Beef
Heat 1 tablespoon of olive oil in a large skillet over medium heat.
Add the finely chopped onion and cook for 2–3 minutes until softened. Stir in the minced garlic and cook for another 30 seconds.
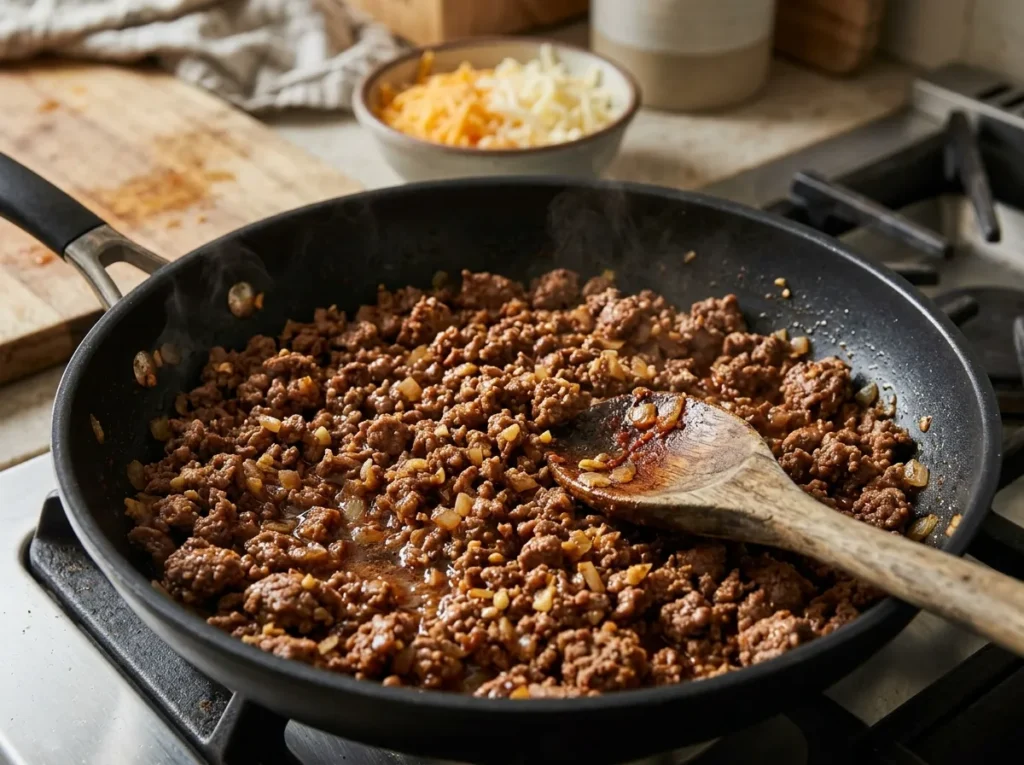
Add the ground beef and break it apart with a wooden spoon. Cook for approximately 6–8 minutes, stirring regularly, until the beef is browned and no longer pink.
Step 2: Season the Filling
Add the paprika, cumin, garlic powder, black pepper, salt, and optional chili powder to the cooked beef.
Stir in the tomato paste and 2 tablespoons of water. Cook for another 2–3 minutes until the mixture is well combined and most of the excess liquid has evaporated.
The filling should be moist and flavorful, not watery. Transfer it to a bowl and allow it to cool slightly before assembling the tortillas.
Step 3: Prepare the Tortillas and Cheese
Place the tortillas on a clean cutting board. If they feel stiff, warm them briefly in a dry skillet to make them more flexible.
Combine the shredded cheddar and mozzarella in a bowl. Cheddar adds a rich, savory flavor, while mozzarella provides a soft, stretchy texture when melted.
If using red bell pepper, make sure it is finely diced so the pieces fit neatly inside the tortillas.
Step 4: Fill and Roll the Tortillas
Lay one tortilla flat and spread a thin layer of seasoned beef over the surface, leaving a small border around the edges.
Sprinkle a portion of the cheese mixture over the beef and add a little diced bell pepper if desired.
Roll the tortilla tightly into a log. Repeat with the remaining tortillas, dividing the filling and cheese evenly.
Avoid overfilling the tortillas. A thinner, even layer makes rolling easier and helps the skewers hold together during cooking.
Step 5: Cut and Thread the Tortilla Rolls
Using a sharp knife, cut each rolled tortilla into approximately four equal pieces. This creates about 16 bite-sized tortilla rolls.
Thread two pieces onto each skewer, leaving a little space between them so heat can circulate. Arrange the skewers on a parchment-lined baking tray.
If the rolls begin to loosen, position them snugly on the skewer without crushing the tortillas.
Step 6: Brush with Olive Oil
Lightly brush the outside of each tortilla piece with the remaining 1 tablespoon of olive oil.
This helps the tortillas develop a golden, lightly crispy surface as they cook. Do not use too much oil, as excess oil can make the tortillas greasy rather than crisp.
Step 7: Bake Until Golden and Cheesy
Preheat the oven to 200°C (400°F).
Place the tray on the middle rack and bake for approximately 10–15 minutes, turning the skewers carefully halfway through if needed.
Look for golden tortilla edges and visibly melted cheese. Because the beef is cooked before assembly, the final cooking stage mainly warms the filling and melts the cheese.
If preparing the skewers with freshly cooked, hot beef, make sure the assembled filling reaches a safe serving temperature. If the skewers have been refrigerated after assembly, allow extra cooking time and check the center with a food thermometer.
Step 8: Make the Creamy Garlic Dip
While the skewers cook, combine the Greek yogurt, mayonnaise, lemon juice, grated garlic, chopped parsley or cilantro, and a small pinch of salt in a bowl.
Stir until smooth. Add a teaspoon of water if a thinner dipping consistency is preferred.
Cover and refrigerate the dip until serving time.
Step 9: Serve Warm
Remove the skewers from the oven and allow them to cool slightly before serving.
Arrange them on a platter with the creamy garlic dip on the side. Garnish with a little chopped parsley or cilantro for a fresh finish.
Serve while the cheese is still soft and stretchy and the tortilla edges are lightly crisp. For extra freshness, add sliced cucumbers, tomatoes, or a simple green salad.
Tips and Variations for Cheesy Beef Tortilla Skewers
A few small adjustments can make these skewers easier to assemble and even more delicious.
Choose the Right Tortillas
Medium flour tortillas are ideal because they roll easily and hold the filling without breaking. If the tortillas feel dry, warm them briefly in a skillet before filling.
Corn tortillas can also be used, but they are generally more fragile. Warm them carefully and avoid adding too much filling.
Keep the Beef Filling Moist, Not Wet
The tomato paste helps bind the beef mixture and adds a rich, savory flavor. Cook off excess liquid before filling the tortillas.
A watery filling can soften the tortillas and cause the rolls to open during cooking. If the mixture seems too wet, continue cooking it for another minute or two.
Use Cheese That Melts Well
Cheddar gives the filling a bold, savory taste, while mozzarella creates a stretchy, gooey texture. Combining the two produces a balanced result.
Monterey Jack or a suitable halal-friendly pizza cheese can also work. Grate cheese from a block when convenient for a smooth melt.
Avoid Overfilling
A thin, even layer of beef and cheese is easier to roll and keeps the filling inside. Leave a small border around each tortilla so the edges can stay together.
If the rolls are packed too tightly, the cheese may spill out and make the skewers harder to handle.
Make Them Spicier
For a little extra heat, increase the chili powder or add finely chopped green chilies to the beef mixture.
For a milder family-friendly version, leave out the chili powder and use sweet paprika instead.
Add More Vegetables
Finely diced bell peppers add color and a slightly sweet crunch. You can also add a small amount of cooked corn or finely chopped spinach.
Cook vegetables that release a lot of moisture before adding them to the filling. This helps prevent soggy tortillas.
Try Different Cooking Methods
Oven: Bake at 200°C (400°F) for approximately 10–15 minutes, checking for golden edges and melted cheese.
Air fryer: Arrange the skewers in a single layer and cook at approximately 180°C (350°F) for 6–10 minutes, checking early and turning as needed. Cooking time depends on the appliance and the thickness of the rolls. Use only skewers approved for your air fryer.
Grill: Use a clean, lightly oiled grill and moderate indirect heat. Turn the skewers gently and watch closely to prevent the tortillas and exposed cheese from burning. Only use skewers suitable for grilling.
Common Mistakes to Avoid
- Using hot, wet filling: Allow the beef mixture to cool slightly and remove excess liquid before assembling.
- Rolling stiff tortillas: Warm them briefly so they bend without cracking.
- Cutting with a blunt knife: Use a sharp knife to keep the rolls neat and prevent the filling from spilling.
- Cooking at excessive heat: Very high heat can burn the tortilla before the cheese melts evenly.
- Crowding the tray: Leave space between the skewers for more even browning.
- Serving immediately from the oven: Let the skewers cool briefly to reduce the risk of burns from hot cheese.

Storage and Serving Suggestions
Cheesy Beef Tortilla Skewers are best served fresh, when the tortillas are lightly crisp and the cheese is warm and melted. However, leftovers can be stored for quick lunches or snacks.
How to Store Leftovers
Remove the skewers from the serving platter and transfer the leftover pieces to a shallow, airtight container. Refrigerate within 2 hours of cooking, or within 1 hour if the surrounding temperature is above 32°C (90°F).
Store the beef tortilla pieces in the refrigerator at 4°C (40°F) or below for 3–4 days. Keep the garlic dip in a separate covered container and follow the storage guidance for its ingredients.
For food safety, do not leave the skewers sitting at room temperature throughout a party or gathering.
Can You Freeze Cheesy Beef Tortilla Skewers?
Yes. For the best results, freeze the cooked tortilla pieces without the fresh garlic dip.
Allow the skewers to cool, remove the pieces from the skewers if necessary, and place them in a freezer-safe airtight container. Separate layers with baking paper to prevent sticking.
Freeze for up to 2 months for good quality. Thaw overnight in the refrigerator before reheating.
The tortillas may lose some crispness after freezing, but reheating in an oven or air fryer can help restore their texture.
How to Reheat Leftovers
For a crisp exterior, place the skewers or individual tortilla pieces in an oven preheated to 180°C (350°F). Heat for approximately 8–12 minutes, checking that the center reaches 74°C (165°F).
In an air fryer, reheat at approximately 170°C (340°F) for 3–6 minutes, checking frequently to prevent burning.
Microwaving is also possible, although the tortillas will be softer rather than crispy. Heat in short intervals until the filling is steaming hot throughout.
Reheat only the portion needed, and avoid repeatedly cooling and reheating the same leftovers.
What to Serve with Cheesy Beef Tortilla Skewers
These cheesy beef bites pair well with fresh, crunchy sides and creamy dips.
- Fresh garden salad: Lettuce, cucumber, tomato, and lemon dressing balance the rich cheese.
- Creamy garlic dip: Adds a cool, tangy flavor to the seasoned beef.
- Homemade salsa: Provides freshness and a little acidity.
- Roasted potato wedges: Make the meal more filling.
- Corn on the cob: Adds a naturally sweet flavor that complements the savory beef.
- Guacamole: Offers a creamy texture and fresh lime flavor.
- Steamed vegetables: Broccoli, carrots, or green beans make a simple side for dinner.
For a party, arrange the skewers on a large platter with small bowls of dipping sauces. For a complete family dinner, serve three or four pieces per person alongside salad and potatoes, adjusting portions to appetite.
Frequently Asked Questions
1. Can Cheesy Beef Tortilla Skewers be made ahead of time?
Yes. Cook the beef filling in advance, cool it promptly, and refrigerate it in a covered container. Assemble the skewers closer to serving time for the best tortilla texture. Alternatively, assemble them in advance and refrigerate promptly before baking.
2. Which beef is best for tortilla skewers?
Lean ground beef is ideal because it cooks quickly, is easy to season, and spreads evenly inside the tortillas. Beef with a moderate fat content also works, but drain excess fat before adding the tomato paste and spices.
3. What is the best cheese for these skewers?
A combination of cheddar and mozzarella provides a flavorful filling with a stretchy, melted texture. Monterey Jack or halal-friendly pizza cheese can also be used, depending on availability and preference.
4. Can I make these skewers without wooden or metal sticks?
Yes. Arrange the cut tortilla rolls seam-side down on a lined baking tray and bake them without skewers. They will still taste delicious and may be easier to turn and serve.
5. How do I stop the tortilla rolls from unwrapping?
Warm the tortillas before filling, spread the ingredients evenly, and roll them firmly without overfilling. Place the seam underneath when arranging the rolls, and thread them snugly onto the skewers.
6. Can I use leftover cooked beef?
Yes. Finely crumble or chop the cooked beef and warm it in a skillet with the onion, garlic, spices, tomato paste, and water. Make sure the filling is moist but not watery before assembling the tortillas.
7. Are Cheesy Beef Tortilla Skewers suitable for children?
Yes, they can be a family-friendly option. Use mild paprika, omit the chili powder, and cut the finished pieces into manageable portions. Always remove the skewers before serving to young children to prevent injury.
8. Can I make this recipe gluten-free?
Yes. Replace the flour tortillas with certified gluten-free tortillas and check the labels on the seasonings, tomato paste, mayonnaise, and other packaged ingredients. Choose tortillas that are flexible enough to roll without breaking.
9. Why are my tortilla skewers soggy?
Excess moisture from the beef filling, wet vegetables, or too much oil can make the tortillas soggy. Cook off excess liquid, use finely chopped vegetables, and brush the outside with only a thin layer of oil.
10. How do I know when the beef skewers are safe to eat?
The ground beef must reach an internal temperature of 71°C (160°F) during its initial cooking. If the assembled skewers have been chilled, reheat them to 74°C (165°F). A food thermometer is the most reliable way to check.
Conclusion
Cheesy Beef Tortilla Skewers are a fun and flavorful way to serve seasoned beef, melted cheese, and golden tortillas using simple everyday ingredients. The savory filling, stretchy cheese, and lightly crispy edges make every bite satisfying.
With easy preparation, flexible cooking methods, and plenty of topping options, this recipe works for busy weeknight dinners, family gatherings, and party platters alike.
Try these Cheesy Beef Tortilla Skewers with creamy garlic dip and a fresh salad for a delicious homemade meal. Customize the spices, experiment with different cheeses, and share the recipe with anyone who enjoys an easy, cheesy beef dish.